
Understanding Exposure in Photography
What Is Exposure?
Exposure is one of the most important concepts in photography. Simply put, it refers to how much light reaches your camera’s sensor when you take a photo.
Getting the exposure right means capturing an image with the right balance of brightness and detail.
If too little light reaches the sensor, the image becomes underexposed—it looks too dark, and details may disappear into the shadows.
If too much light enters the camera, the result is an overexposed photo, where bright areas lose detail and appear washed out.
The goal is to find the right balance, creating an image that preserves detail in both the highlights and the shadows.
Keep in mind: There isn’t always one „correct” exposure. The best settings often depend on the scene and the creative mood you’re trying to achieve.
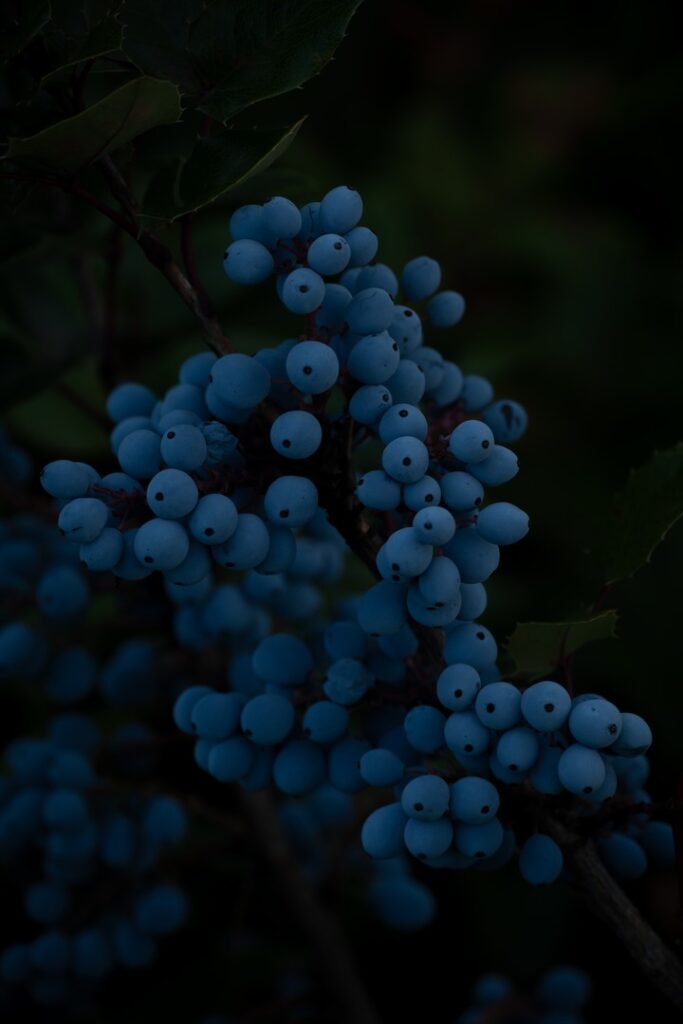

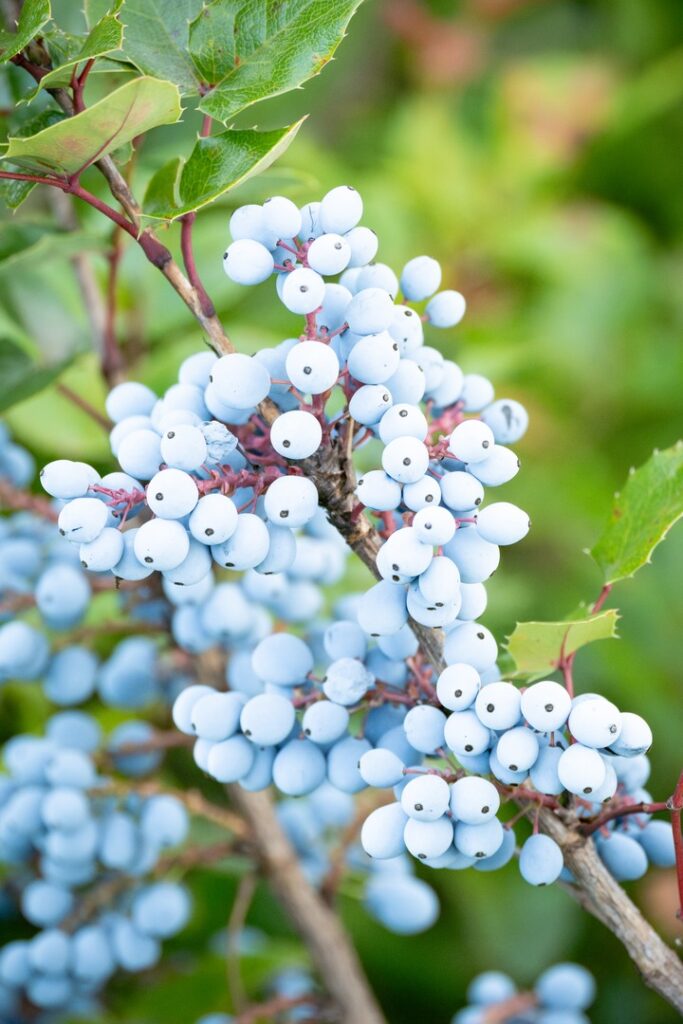
Underexposed image – Too dark
Correctly exposed image
Overexposed image – Too bright
The Three Elements of Exposure
Exposure is controlled by three camera settings that work together. Photographers often call this the Exposure Triangle.
Aperture
Aperture controls the size of the opening inside your lens, determining how much light enters the camera.
- Wide aperture (f/2.8, f/1.8) lets in more light and creates a beautifully blurred background, making it ideal for portraits.
- Narrow aperture (f/11, f/16) lets in less light but keeps more of the scene in sharp focus, making it perfect for landscapes.
Choosing the right aperture affects both exposure and the artistic look of your image.
Shutter Speed
Shutter speed determines how long your camera’s sensor is exposed to light.
- Fast shutter speeds (1/1000s or faster) freeze movement, making them ideal for sports, wildlife, or action photography.
- Slow shutter speeds (1/2 second or longer) allow more light into the camera while creating motion blur, smooth waterfalls, or dramatic light trails.
Shutter speed plays a major role in how movement appears in your photos.
ISO
ISO controls your camera sensor’s sensitivity to light.
- Low ISO (100–200) produces clean, sharp images with very little digital noise.
- High ISO (3200 and above) brightens your image in darker environments but also introduces more grain or noise.
Whenever possible, it’s best to use the lowest ISO that still gives you the exposure you need.
The Exposure Triangle
The three exposure settings are closely connected.
If you change one setting, you’ll usually need to adjust one of the others to maintain the same overall brightness.
For example:
| Setting | Aperture | Shutter Speed | ISO |
|---|---|---|---|
| Starting Exposure | f/4 | 1/125 sec | ISO 100 |
| Close the aperture to f/5.6 | Less light enters | Compensate with 1/60 sec | ISO 200 |
Understanding this relationship gives you much more creative control over your photographs.
Automatic vs. Manual Exposure
Most modern cameras offer several ways to control exposure.
Automatic Mode
In Auto mode, the camera chooses the exposure settings for you.
This works well in many everyday situations, but cameras can struggle with scenes that contain extreme contrast, such as:
- Backlit subjects
- Snow-covered landscapes
- Bright beaches
- Concerts or stage lighting
- Sunsets
In these situations, the camera’s automatic settings may not match what your eyes actually see.
Manual Mode
Manual mode gives you complete control over aperture, shutter speed, and ISO.
Although it requires more practice, it allows you to create exactly the look you want instead of relying on the camera’s decisions.
Many photographers eventually switch to Manual mode for maximum creative freedom.
A Great Way to Learn
If you’re just starting out, you don’t have to jump straight into Manual mode.
Instead, try using one of your camera’s semi-automatic shooting modes:
- Aperture Priority (A or Av) lets you control depth of field while the camera selects the shutter speed.
- Shutter Priority (S or Tv) lets you control motion while the camera adjusts the aperture.
These modes are an excellent way to understand exposure without feeling overwhelmed.
Common Exposure Problems and How to Fix Them
Your Photo Is Too Dark
Try one or more of the following:
- Use a wider aperture.
- Slow down the shutter speed.
- Increase the ISO.
Your Photo Is Too Bright
Reduce the amount of light by:
- Choosing a narrower aperture.
- Using a faster shutter speed.
- Lowering the ISO.
Your Images Look Noisy
Digital noise is usually caused by high ISO values.
To reduce it:
- Use the lowest ISO possible.
- Add more light to the scene.
- Use a tripod so you can shoot with a slower shutter speed instead of increasing ISO.
Your Photo Is Blurry
Blur is often caused by camera movement or a shutter speed that’s too slow.
To improve sharpness:
- Increase the shutter speed.
- Hold the camera more steadily.
- Use a tripod or image stabilization when available.
Final Thoughts
Mastering exposure is one of the biggest steps toward becoming a better photographer.
By learning how aperture, shutter speed, and ISO work together, you’ll gain far more creative control over your images.
Remember, photography isn’t about finding one perfect exposure – it’s about choosing the settings that best tell the story you want your photo to share.